Modeling/Animation
Using Two Skeletons to Animate Faster
When making a 3D game, at some point you have to breathe life into your character models. This is done with rigging, which involves adding bones to our character that influence how the model moves. However, when it comes to a rig, an animator’s needs doesn’t always match up with the game programmer’s needs. Game engines like Unreal Engine and Unity necessitate a well maintained bone hierarchy when it arrives in the engine, and that isn’t usually the conventional style of rigs animators use. Thus, at Breadbox Games, we make use of two rigs layered on top of each other: one deform rig that maintains a strict hierarchy, and one control rig filled with tools for the animator. This setup is a modified configuration inspired by the tutorial linked here: [Blender 2.8/2.9] Game-ready Rigs #1 – (UE4/Unity/Godot)
Setup:
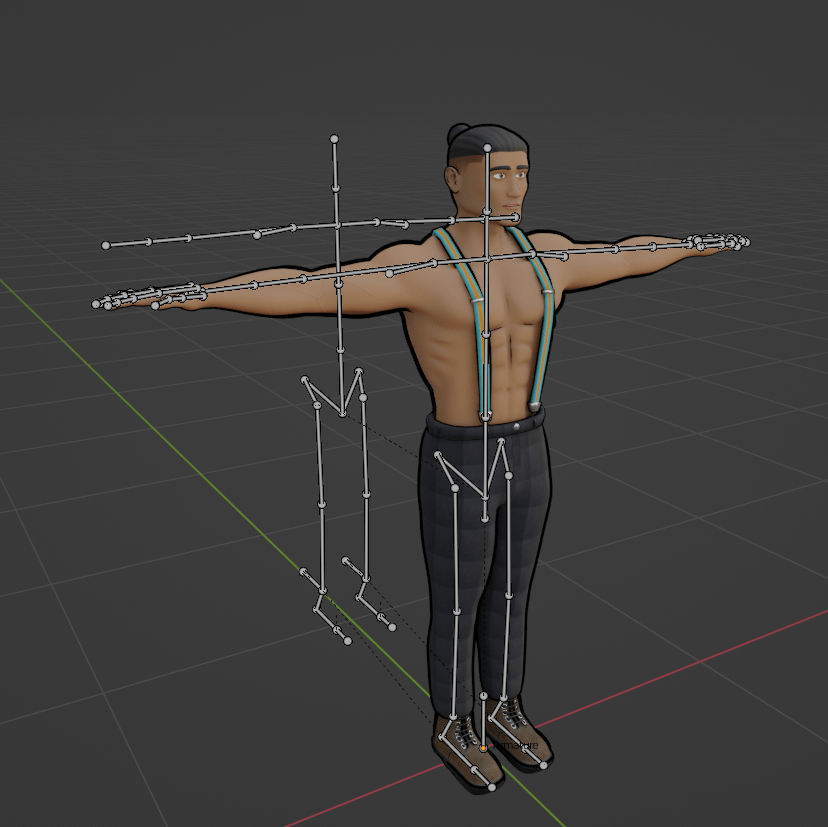
The way we create this rig starts with a simple deform rig.

A rig like this contains everything you need to start animating your character. However, as you start animating with a rig like this, you’ll start reaching its limitations rather quickly. Simple actions like taking a step or lifting a hand will require multiple bones to be moved and animated at the same time. This is the point where your typical arm and leg Inverse Kinematic bones (IKs) will come in. There’s just one problem: most rigging tutorials will have you break up the bone hierarchy and make the hand and foot bones children of the IKs (to provide maximum control of the hand and foot rotations, and not let the IK system rotate them for you). How do we circumvent this problem? We create a copy of the deform rig!
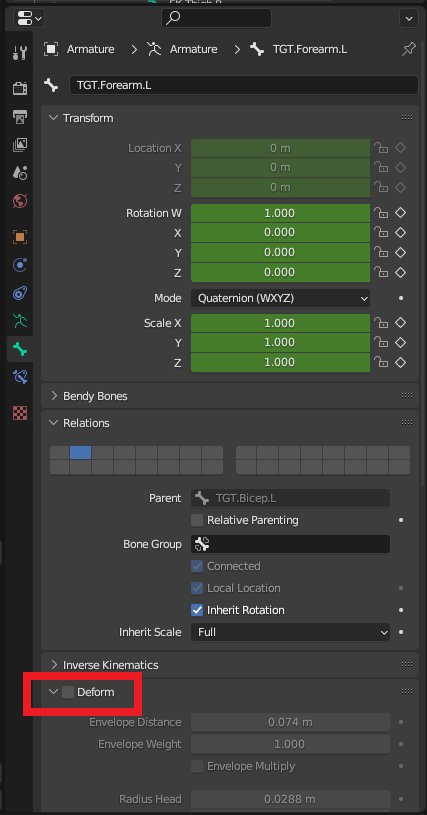
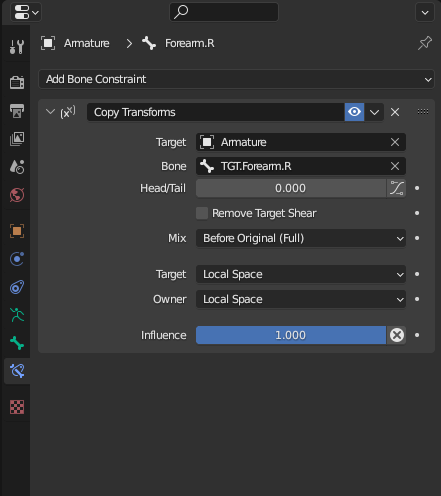
With these bones we will need to uncheck “deform” on each one in the bone property tab. Using Blender’s ‘Copy Transforms’ modifier, we can begin the painstaking process of adding this modifier to every deform bone we have and having it copy the transforms of the copied version of the rig*.
*note: CGDive has developed a python script to make this process quicker, but does not make use of the copy local transform setting. If you intend on using that script, it could require some editing.
In opposition to CGDive, we’ve opted to set our “Copy Transforms” modifier to local space rather than world space.
The reason we don’t use the copy world location for our modifiers is because we want to maintain the ability to move our underlying deform bones. Why would we want this? In nearly every animation rig setup, an “IK/FK switch” is created. You can use this switch to turn the IK controls on and off (Between Inverse Kinematics and Forward Kinematics). As powerful as IKs can be, they also have limitations, requiring the animator to use forward kinematics to get a fast and quality result.
Unfortunately, switching the IKs in the middle of an animation will make the affected bones jump to other positions unnaturally, resulting in animators having to creatively hide the switch from the camera. However, with this rig, there’s no need for an IK/FK switch. By taking control of the underlying bones, you can move any of the bones freely without altering the IK controllers.
Each arm was animated with just two keyframes, but the FK movement (left side) can make an arc much more easily than the IK controller (right side)
(Caution: remember to set key frames before and after your FK movements. Also, be certain to end your FK movement to its resting position, otherwise the bones will be skewed for the rest of your animation.)
Once this is all set up, you then have the ability to set up your IKs on the target rig and parent them in any order that you like*, all without having to worry about your bone hierarchy being changed.
*One exception being that the copies of the deform bones have to at stay connected or constrained to the spot of the original deforming bone.
Advantages:
- We can create custom controls and bone hierarchies for our character without having to worry when we export to our game engine.
- We have access to both our IK and FK controls without having to worry about switching between them mid-animation.
Disadvantages:
- Difficult to set up. Although there are ways to bulk add the modifiers either natively or through scripts, doing it manually can be time consuming and rather confusing.
- Can be confusing to use. You have to properly set up bone layers to keep track of all the bones that exist on the model (especially if you add other control bones on top of the target skeleton).
- This rig setup does not support scaling. Because the deform bones do not influence the target bones, your controllers won’t scale to follow the deform bones. Scaling the target bones can cause unpredictable movement in the rest of the control rig. Additionally, game engines tend to have a difficult time interpreting bone scaling in animation. Regardless, it’s always good to experiment and see what works.
At Breadbox Games, we use the double skeleton rig configuration to keep our animation process quick and simple, even if it means spending more time up front to set it up. Rigging can be done thousands of different ways, so give this method a try when you get the chance!
